The best aspects about this program are that it is user-friendly and more intuitive for many students than the bracket notations. The only drawback is that you have to be able to download it onto your computer to use it (i.e., students using school computers may not be able to work with this program).
When you download it, be sure to install the entire TreeForm folder onto your computer. If you don’t install all the components in the folder, the program will be missing some of its images, which makes it a bit difficult to work with at times. Once you have the folder downloaded and installed on your computer, you are ready to use the program. It has three different icons for you to click on, depending on your operating system: .app for Mac, .bat for Windows, and .jar for Linux. If you try to open the wrong one for your computer, it simply won’t open. If that happens to you, try another.
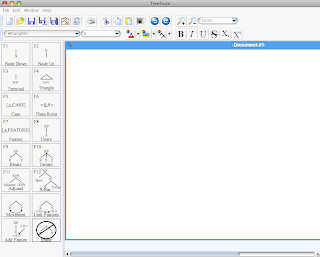
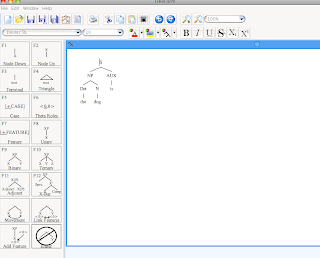
After you open TreeForm, you will see a screen that looks like this:
 |
| TreeForm screenshot |
The large white area is your drawing board, and down the left-hand side of the screen you will find your “tray” of options:
 |
| TreeForm tray of options |
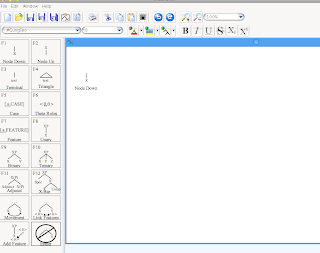
Each button on the tray presents an option for you to choose. For example, click on the ‘Node down’ button on the tray and hold down your mouse as you drag the cursor into the white area. You can’t see the cursor in the following screenshot, but here is a picture of the ‘Node down’ being dragged into the drawing area:
 |
| Dragging 'node down' to the drawing board in TreeForm |
When you let go, an ‘X’ will appear on the screen. Double-click on that X to change it to any label you’d like. To build onto that node, you can either build up by selection ‘Node up’ from the tray and dragging it into the white area until the node you want to build on is highlighted. When you let go, a node will appear above the one you already had. Or you can build down by selecting ‘Node down’ and dragging that over to the screen. For instance, if you labeled the first node you put onto the screen ‘S’ (for the sentence level), then you could drag ‘Node down’ over until the S was highlighted and then release the mouse button. You would end up with a node below the S. To change the X that appears in the node, you simply need to double-click it and change the label. Let’s say you’ve labeled the first node ‘S’ and the node below it ‘NP’, and you want to add a sister node for the NP. To do that, you need to once again drag ‘Node down’ from the tray until the S is highlighted; this time when you release it, though, you will have two options for where you want to put the node:
 |
| Two options for node placement in TreeForm |
If you want the second node to the right, you need to move your mouse over until the right-hand dot is illuminated green (as it is in the picture above) and click on it. If you wanted to add a third node at that same level, you do the same process you just did; only this time, you’ll have three options for placement (to the left of, in between, or to the right of the other two nodes).
 |
| Three options for node placement in TreeForm |
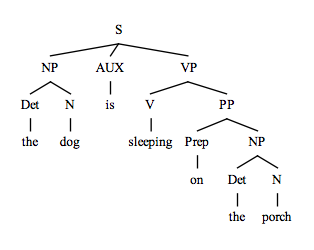
Using that same process, you can easily build entire trees, putting in any labels you’d like by double-clicking the Xs. When you’ve reached what will be the terminal node (generally, the terminal node is the one where a word is inserted instead of a label), you can use the ‘Text’ button in the tray.
 |
| Syntactic tree using TreeForm |
When your tree looks like what you want, you can go to ‘Edit’ and then ‘Copy tree’. Doing that puts the tree into your computer’s clipboard, which allows you to go to any document you’re working on and hit ‘Paste’ where you want the tree to go. Your tree will then appear in a typed document.
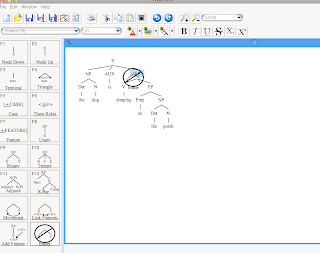
If you need to erase something, you can either hit ‘undo’ (or control-Z) if it is something you just did that needs to be undone or use the ‘Eraser’ button in the tray. To use the eraser button, click and hold down on it, dragging it over to the drawing board area. Move it over the tree until the highest node you want erased is highlighted.
 |
| Dragging the eraser and highlighting the VP node in TreeForm |
When you release the eraser, that node and everything below it will be erased.
 |
| Tree from above with its VP erased in TreeForm |
Using those four buttons (node down, node up, text, and eraser), you can create basic tree structures. The other buttons in the tray are for more advanced tree structures. If you play around with the features, you’ll find that you have a lot of leeway with the program and the look of your trees. You can change the font, the colors of individual nodes, the colors of branches, and more. On top of all that, you can easily use TreeForm to create any type of hierarchical tree you need: Instead of putting syntactic labels in the nodes, put anything you’d like:
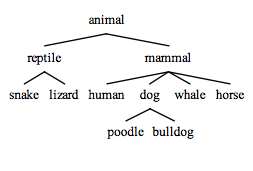 |
| Non-syntax hierarchical structure created using TreeForm |
Just like with phpSyntaxTree, the best way to figure out what the program is capable of is to play with it. Go have some fun with TreeForm!


I'm having trouble figuring out what kind of file format to save it in. It doesn't seem to have a default. Do you have any help?
ReplyDeleteIf you save the tree in TreeForm, it will automatically save as an .xml file. If you save it that way, while in TreeForm, you can click on "Open File" and then select that .xml file to open the tree back up in the program and edit it as needed. While this format is handy for editing the tree, it is not helpful if you're trying to use the saved tree in another program.
ReplyDeleteIf you wanted to save the tree as a picture, click on "Export Tree" (under File menu) instead. When that option box pulls up, it should have .png as the export file type already pulled up. You can, however, change that extension if you prefer another file type.
When I am using trees directly in a document, I always do the "Copy Tree" route (under Edit menu). That makes it so I can copy and paste directly into a document. I don't tend to save all the trees on my computer--I make so many that having all those individual files would clutter up my folders.
If that doesn't answer your question, please let me know!