Showing posts with label ling tool. Show all posts

Tuesday, September 25, 2012

The Joy of Phonetics: Getting help with IPA

One area many students struggle with in linguistics is phonetics. Understanding IPA, the IPA charts, transcriptions, and the application of IPA to phonology can be quite frustrating for beginners. Luckily, there are several helpful websites that just might help those frustrated students. (Some of these are mentioned in a past post, but they are worth mentioning again.)

1. UCLA's Interactive IPA Chart (from Ladefoged's "A Course in Phonetics")

Screenshot of UCLA's IPA Interactive Chart
The IPA chart that can be seen in the screenshot is interactive in that it allows you to click on any area to zoom in; once you're zoomed in on an area, it allows you to click on an individual symbol, and a sound file will play so that you can hear the sound that particular symbol represents, which is incredibly helpful for those world sounds that may not be in your native language. The only downside is that the sound files take you to a different screen instead of playing while you're still looking at the chart.

2. York University's Interactive IPA Chart

Screenshot of York's IPA Chart

This IPA chart is similar to the UCLA chart above but was created by Eric Armstrong and has a few extra features that students may find helpful. Just like the UCLA website, you first have to click on a section of sounds to zoom in before you can play with the individual features. Once you're zoomed in, you can click on an individual symbol to hear what sound it represents; one advantage to this website is that the sound file plays without taking you to a different screen.

Another advantage is that if you mouse over any words/symbols on the chart, you can find out more information. For instance, if you mouse over a manner or place label on the consonant chart, a definition box will pop up, like this:

Definition box
If you mouse over a symbol in the chart, the IPA descriptors of the symbol and the "common" name will appear in the box over the top of the chart:

Symbol information
Students often get frustrated by words like 'engma' being thrown around when learning the IPA; this website can help those students learn those names while still learning the IPA descriptions associated with them.

3. Iowa's Interactive Sounds of Spoken Language

Screenshot of Iowa's Phonetics Website

If you aren't learning the IPA charts for world languages but are focusing on either American English, Spanish, or German, then you will most likely find this website helpful. From the home page (which you see in the screenshot above), you can click on your language of choice. Clicking on the American English option will take you to a new screen that looks like this:

The Sounds of American English
From this view, you can decide whether you want to look at consonants or vowels and which category you want to explore. For instance, you might click on the "fricative" button and then click on the "/z/" to get to this screen:

Focus on the /z/


Every aspect of this website is interactive. You can play the animation to watch what happens in the sagittal section when the sound in focus is made. You can choose a play-by-play, in which case each stage of the sound is fully described. Or you can listen to sound files on the right-hand side while watching what the outside of the mouth looks like during sound production. This tool is especially helpful for anyone working in the speech pathology field.


4. Interactive Sagittal Section

Screenshot of Interactive Sagittal Section website
Created by Daniel Currie Hall, this website allows you to choose the features of the sound you're working with (e.g., voicing, placement, manner), and the sagittal section on the screen changes to match the requirements, which can help internalize the difference between all those columns and rows in the IPA chart (and, in the end, help with understanding natural classes). After seeing Iowa's website before this one, you may wonder if it really is all that helpful. The answer is yes. This website isn't constrained to sounds in particular languages (but is constrained by types of sounds). Also, the sagittal sections more closely resemble what some students see on exams/homework assignments and might be more helpful.

There are other online interactive IPA tools, such as the University of Victoria's IPA chart and another IPA chart that is simply housed at www.ipachart.com. The goal is for you to find one that you can work with and that helps you understand the material better. Phonetics shouldn't be frightening--it should be fun to explore the sounds of language.

If you have know any other phonetics websites that you feel should be mentioned, leave the website (and the reason you like) in the comments below.

Sunday, February 26, 2012

Spotlight on Linguistic Tools: Syntax Tree Generator

A fellow linguist recently shared a link with me for another online tree-diagramming program--one that I think is definitely more user-friendly than the other online programs that I've tried out. It is the Syntax Tree Generator. The Help page states that the program works best with Google Chrome--I've tried it on Firefox, Safari, and Opera without any issues. If you are on Google Chrome when you go to the website, you'll see a screen that looks like this:

Initial screenshot of Syntax Tree Generator

The screen changes just a bit if you use other browsers (e.g., the sliders for font and spacing are boxes for numerical inputs), but the overall design is still the same. The text box at the top is where you put in the information that dictates what the tree will look like.

Text box for diagramming
The sentence in the above screenshot is what you see when you first go to the website. You can play with that sentence or put in your own new sentence entirely. I'm using my own sentence for the examples below.

The basics of this program is the use of bracketing to mark constituents and embedding. The mother node label is the first entry after the open bracket, and a space after that label will result in a branch to a daughter node. The cool thing about this online program is that the diagram on the page follows what you type in the text box in real time. In other words, as you make changes, the diagram changes along with what you type, and you can see if what you type is what you had intended for the diagram.

One of the first features that is handy is the ability to diagram with triangles, which is indicated by the asterisk (*) after the mother node; for instance, if I type in [S* The dog is sleeping], I get this diagram:

[S* The dog is sleeping]
If there are no brackets within the original set of brackets, there will be no daughter branches. If you take out the * after the mother node, the triangle will turn into a single branch:

[S The dog is sleeping]
Again, the program reads whatever comes directly after the opening bracket as the mother and anything following it as the daughter. Even though four words (with spaces) follow the mother node, there is only one branch because there is only one set of brackets.

By adding brackets, you can add more daughters to diagram; the following diagram is made with the input [S [NP* The dog] [Aux is] [VP sleeping]]:

[S [NP* The dog] [Aux is] [VP sleeping]]
Now the mother node S has three daughters because there are three sets of open and closed brackets inside the S brackets. Each of the daughters in this example have only one branch (or one triangle). Each daughter can be expanded by adding more sets of brackets within it. The following diagram is [S [NP [Det The] [N dog]] [Aux is] [VP sleeping]]:

[S [NP [Det The] [N dog]] [Aux is] [VP sleeping]]
The difference with this diagram is that the NP node has been expanded to have two daughters; that's because the NP brackets now have two sets of brackets--[Det The] and [N dog]--inside.

Nodes can also be "uni-branching", as in the following diagram:

[S [NP [Det The] [N dog]] [Aux is] [VP [V sleeping]]]
In this case, the VP node now has the daughter V, which then branches down into the text node sleeping.

By using the bracketing method, sentences can get more and more complex. Again, the wonderful thing about this is the real-time diagramming that follows the input in the text box. Whenever you have a diagram you want to use in a document, simply right-click the image and copy it. Then you can paste the image into any document you need.

Another nice thing is that you can download the app for offline use by going to the Wiki page and clicking on the download link. After downloading the .zip file and unzipping the file, you'll see the following in the downloaded folder:

Downloaded folder for offline use
Click (or double-click) on the index.html (which is highlighted in the image above), and an offline version of the webpage will open. It's routed through your computer files, so you have full usage of the program without needing internet access. You need all the other files in the folder in order for the program to work without being online, so you need to keep all those together.

Have fun diagramming!

Updated note: The designer of this app updated the look, so the screenshots are a bit dated. The new look is incredibly sleek and even more user-friendly. I highly encourage you to check out its new look: http://mshang.ca/syntree/.

Thursday, February 2, 2012

Spotlight on Linguistic Tools: Linguistics Online Playgrounds

Linguistics Online (or 'LiOn') is a website that was developed as an online supplement for linguistics students at Utrecht University. One of the components of the website is the Tool Playground; in the Tool Playground are two incredibly valuable resources for many linguistics students: the IPA Keyboard Playground and the Treebuilder Playground.

The IPA Keyboard Playground is exactly what it sounds like: another online IPA keyboard. The keyboard is organized in the consonant and vowel IPA charts but doesn't have all the diacritics and more obscure IPA symbols (like those for clicks). Since many students don't necessarily need the extra IPA symbols, this keyboard is more streamlined for ease of use.

LiOn IPA Keyboard Playground screenshot

When using the keyboard, you can (as with other online keyboards) simply type into the text box (which for this one is situated between the consonant and vowel charts, which helps to visually separate the two). When you need a symbol you can't type, you simply click on its button in the chart, and the IPA symbol will be inserted where the cursor is. When you've finished with what you'd like to type, you can then copy and paste the text directly into your document on your word processor of choice.

The layout of the IPA Keyboard Playground is accessible and visually appealing. The text box isn't as large as the text box for some of the other online IPA keyboards, but often when we're typing in IPA, we're typing one line or one utterance (or even one word) at a time, so you may not find that to be a downfall. If, however, you want to enter multiple lines of text in IPA at once, you won't be able to put in a line break in this keyboard. Remember that online keyboards are all about functionality--you may find that you like to use one online keyboard for one task while you prefer a different one for another task.

The Treebuilder Playground is also what it sounds like: an online tree diagramming (or tree building) program. This online system is not as intuitive or user-friendly as the downloadable TreeForm software; however, it may be more accessible to many students than the online phpSyntax program. When you go into the Treebuilder Playground, you'll see this:

LiOn Treebuilder Playground
The program automatically starts you with a top node of S; however, if you want to diagram something else--like a morpheme tree, for example--then you simply need to click on the box with the "E" (if you look closely, you'll see it actually says "Edit"). In edit mode, you can change the text for the top node. Every time you edit a node, you have to click on the green checkmark that appears next to the editing text box. Otherwise, it won't save any changes you made.

To add nodes below the top node, click on the "L+" or "+R" in the box. For the first node you add, it doesn't matter which of those you click. When you go to add a second daughter node, though, you need to decide if you want it to the left or right of the first one. As you add nodes, a tree will begin to form in the area above the top node box:

LiOn Treebuilder Playground: Building a diagram
As you can see in the screenshot above, the building space retains all the node boxes that you add--you can continue modifying the tree by adding more or taking away any existing nodes. When you add new nodes, make sure you are adding to the mother node--the trees in this program are built top-down. Once you've finished your tree, right-click on the tree diagram above all your nodes, and click on "Save image as..." to download the image to your computer. You can then insert that image into your document, like so:

LiOn Treebuilder Playground: Diagram
Again, this is more intuitive for many people than the system utilized by phpSyntax (with embedding through bracketing), but if you're able to download software, I still highly recommend using TreeForm. The LiOn Treebuilder Playground is a very handy tool to utilize, though, when you don't have the ability to download software (like when you're using a computer in the library).

The Tool Playground area of LiOn has many more useful tools that you may want to explore--it also has exercises for learning linguistic concepts, which is a nice feature for anyone learning more about linguistic analysis.

Thursday, October 20, 2011

Spotlight on Linguistic Tools: Two More Online IPA Keyboards

I had previously talked about TypeIt's online IPA keyboard on this post. Since that post, the TypeIt keyboard now has an option for a full IPA keyboard, which is exciting for anyone who needs to type with more than just those IPA symbols found in English. You can go directly to that keyboard by following this link. When you go to the website for the full keyboard, you will see the following:

IPA TypeIt Full screenshot


In the above picture, you'll see the setup is the same for the English keyboard--there is white space for typing, which you can do with the keys on your computer's keyboard, and then you click on the special symbol you need to insert it into the text. Next to last row of options, you might notice that it says "more." If you click on that, you will get two extra rows of IPA goodies to type with:

IPA TypeIt Full: Extra rows


For all of the diacritics that get added above or below symbols, you will need to type the symbol you want it added to first and then hit the diacritic button. For example, if I want to do a voiceless [r], I need to type r into the text box before hitting the voiceless diacritic so that I get [r̥]. If you're trying to use a diacritic that connects two symbols, type in the first symbol, hit the diacritic button and then type in the second symbol. For instance, if you're typing in a diphthong for [eɪ], you should type an e first, hit the overhead arch, and then type in the next symbol to get this: [e͡ɪ].

That keyboard is still an excellent option for anyone wanting to use an online IPA keyboard; however, it isn't the only option. There are two more online IPA keyboards I've come across that I quite like since writing that post.

1. Weston Ruter IPA Keyboard
This online keyboard works exactly like the IPA TypeIt keyboard--it provides you with a text box that you can type in using your computer keyboard, it provides you with buttons you can click on to get the IPA symbols, and you can easily copy and paste what you have typed into your document. The difference is in the layout. The Weston Ruter keyboard is laid out like the full IPA chart, as partially seen in the screenshot below.

Weston Ruter IPA Keyboard screenshot


It's impossible to get the entire page into one screenshot, so I highly suggest you go to the website and play with it to see if you like the layout. The text box at the bottom of the screen doesn't move--what does move is the upper part of the screen, where you can scroll through the consonant chart, non-pulmonic consonants (like clicks and implosives), vowels, and diacritics. The diacritics work like the ones described above: you must type in the symbol first and then click on the diacritic you want to go with it.

I really like the Weston Ruter keyboard because I am so used to working with the IPA chart that it's easier for me to see what I need on the chart. The one thing I'm not so fond of is that the whole chart doesn't fit nicely (no matter how much I zoom out on the website) onto one screen, and having to scroll back and forth can get annoying.

2. IPA Character Picker
This online keyboard is my favorite of the three. It's not my favorite because of features--all three keyboards work in the same way, all three allow you to choose font and other specifications, and all three have a copy-and-paste capability for importing text into your document. Again, the difference is in the layout. When you first go to the IPA Character Picker website, you'll see this:

IPA Character Picker screenshot


The default screen is an IPA chart with special characters and diacritics below the consonant and vowel charts. However, if you prefer more of a keyboard feel, you can click on the keyboard option and see this:

IPA Character Picker: Keyboard layout


Now the symbols are laid out to match where they would typically occur on a QWERTY keyboard. That might help people more unfamiliar with the IPA charts--and some people might just prefer the look and feel of an actual keyboard. If you still want more options, you can click on the font grid option for this layout:

IPA Character Picker: Font grid layout


The screenshot above is zoomed out quite a bit to get the whole grid on there. If you're used to looking at how unicode character grids are organized, you might prefer using the font grid layout to the other two.

I like this online keyboard for its variable layouts, but even more than that, it does something quite cool and handy (especially if you're just beginning with the IPA and trying to learn all the symbols). When you mouse over a symbol, you'll see a description like this pop up at the top of the screen:

IPA Character Picker: Symbol description


In the screenshot above, you can see that a description pops up for whatever symbol your mouse is hovering over; in this case, it's the unvoiced postalveolar fricative, which also goes by the unicode number 0283, which can also be called "Latin small letter esh". You learn the IPA description, the unicode 4-number description, and the "street name" of the symbol all in one go.

I now give the IPA Character Picker as my site of choice to my students. However, I think it's good to have options, and so I still recommend you take a look at all three and decide for yourself which one works best for you.

Sunday, January 16, 2011

Dictionary & Word Apps to Soothe the Word Lover's Soul

The spring semester is almost upon us, so I thought this would be an entirely appropriate time to do a post on apps that might come in handy to any budding (or not-so-budding) linguist. All the apps in this post are available on the iPhone and iPod Touch (and with the exception of one, also on the iPad); I cannot say for certain whether all are available for other devices.

Anyone who has had a course with me knows my love of (er, obsession with) dictionaries, so it should come as no shock to those students that I have quite a few dictionary apps downloaded on both my iPod Touch and iPad. The ones I have not downloaded are either because they are too expensive or, from what I can see, they do not offer unique enough information or interface to catch my attention. If I have missed any dictionary/word apps that you think absolutely should have been included, please leave the name of that app in the comment section below. The following reviews are ordered in terms of my favorites.

1. WordBook English Dictionary & Thesaurus by TranCreative Software
WordBook is my go-to app when I want to look up a word's meaning, associated words, and/or etymology. You do not need to be online to use the app itself; however, some of the features (e.g., online links) require connection to the internet. Some of the features that make it stand out from other dictionary apps are these:
  • selection of three different notation systems for pronunciation guides (IPA, American Heritage Dictionary notation, Merriam Webster's Collegiate Dictionary notation), as well as a comparison chart of those three systems
  • sound files for each word that actually sound like real people (with three different options of speakers: "Sue", "Alex", and "Cindy"
  • every word in the entries are linked to their own entry (you just have to touch any word you want more information about)
  • ability to bookmark entries, add notes to entries, and share entries via e-mail
  • ability to select font and text size
  • supplies words of the day for anyone wishing to learn new words
  • easy-to-read etymologies
  • customizable links to online sources (e.g., link to that word's Wikipedia entry or a Google search for that word) [*requires internet connection]
  • shake for a random word entry
When you type welcome into WordBook, here is what you will see:

Entry for 'welcome' in WordBook app

I highly recommend this app for anyone in the market for a portable dictionary.

Price: $1.99 (iPhone)

2. WolframAlpha by Wolfram Alpha LLC
One of the reasons I like the Wolfram Alpha app so much is that it can function as a dictionary, but since it is a database of virtually everything, it can also function as a scientific calculator, weather updater, encyclopedia, and more. It also has an online counterpart that can be handy when you're at your computer: WolframAlpha: Computational Knowledge Engine.

For me, there is one major drawback to this app: It is not really intuitive, so I still have to refer to the guides whenever I want to look up a new type of information. When you type in "word X" (i.e., in order to search for a word's definition, you need to type word followed by the word you're interested in looking up: word time, word welcome, etc.), you get these sections (word welcome is the entry that supplies all the examples below):
  • definitions
  • pronunciation
  • hyphenation (e.g., wel-come [7 letters | 2 syllables])
  • first known use in English
  • word origin (which only lists the language of origin--not the forms or any extra information like related words)
  • typical frequency in written and spoken language
  • inflected forms (e.g., welcomes, welcomed, welcoming, welcomer)
  • synonyms
  • antonyms
  • narrower terms
  • broader terms
  • rhymes (with)
  • other notable uses (e.g., surnames, given names, city names, movie titles, internet domains)
  • crossword puzzle clues (e.g., good reception; hug, maybe; kind of wagon)
  • scrabble score
  • texting form
  • anagrams
  • phone keypad digits (e.g., 935-2663)
When you type welcome into WolframAlpha, here is what you will see:

Entry for 'welcome' in WolphramAlpha app


I like the app because you get a lot of types of information about the word, and there are some cool links available. For instance, when synonyms are provided, you can click on a link that will expand that section and show you a word network of synonyms. What I find frustrating about the app is that some of the sections that I wish were expandable are not. Since I do a lot of work where I need to know specific etymologies, this app doesn't really help me. It tells me what date is the first known use in English and lists the language(s) the word originated from, but it doesn't show any specific information about its origin. Also, the words themselves are not linked to other entries, which is a drawback if, say, a definition uses a term you do not know. Instead of being able to simply click on that term, you have to look that term up separately.

So why is it still my second favorite? It's a handy app because its database is so thorough. I use it to find out weather patterns in the area, information on language families, and more; in other words, I use it for more than just a dictionary.

Price: $1.99

3. English BigDict by Brentwick
The English Big Dictionary app has a beautiful interface, which is one reason I like this app so much. When a dictionary app makes you smile just by looking at it, it is a pretty cool thing. Some of the features unique to this app are these:
  • etymologies written out like prose (easy-to-read, yet thorough with information on related terms in other languages)
  • pronunciation guides in IPA and SAMPA
  • audio files for US and UK pronunciations
  • translations into other languages for the more common entries (the more common the word, the more translations available)
  • associated phrases and their uses
When you look up welcome in English BigDictionary, here is what you see:

Entry for 'welcome' in English BigDictionary app

Translations for 'welcome' in English BigDictionary app


I bought this dictionary for its etymology sections and translations; I don't use it when I need to look up a word's meaning (I refer to my WordBook app for that), but it could definitely be used that way. The one major drawback for most people will be its price.
Price: $8.99

The Dictionary.com app does exactly what it sounds like: It provides the entries from Dictionary.com directly to your iPhone without needing an internet connection. Each entry provides a sound file for pronunciation, definitions and associated phrases/idioms, and a brief etymology entry. The etymologies provided are so brief, though, that they are a bit cryptic; students new to reading etymological information will most likely not get a lot of information out of them. The app also offers thesaurus entries and a word of the day.

When you look up welcome in the Dictionary.com app, here is what you see:

Entry for 'welcome' in Dictionary.com app
Dictionary.com is a "no frills" app but may be just what you need if all you want is an app to give you words' definitions and synonyms/antonyms.

Price: Free (with ads)
Price: $2.99 (no ads)

*This app has no iPad equivalent.
When you search for a word in the AED app, it separates the entry into parts of speech (e.g., noun, verb, adjective). Every entry provides a pronunciation guide and the ability to bookmark the entry; each part of speech section within the entry provides a general definition, a short example in a sentence, more general associated terms, and more specific associated terms. The app also provides a "shake" feature--you shake your iPhone to go to a random word.

When you look up welcome in the AED app, here is what you see:

Entry for 'welcome' in AED app (on an iPad screen)


The reviews of this app indicate that it is a handy app for writers and for anyone wanting a dictionary that supplies a word association feature. I, however, do not find this as handy as my WordBook app or the other ones above. Maybe I just don't get the coolness of the associations, but it appears to me that the information provided is the same as what I can find in my other, more thorough apps.

Price: $0.99 (this is the current price; if you go to the app store, you will see that the app is currently 90% off, which means this app will increase in price shortly)


*American Heritage Dictionary by Enfour, Inc.
Now I have left reviewing territory and entered my wish list territory. The AHD app is only for the iPhone/iPod Touch, which is one of the reasons this app is remaining on my wish list and not being immediately downloaded onto my iPad (I have yet to get an iPhone, and my iPod Touch doesn't go everywhere with me). My former students know of my love for the American Heritage Dictionary, and the app looks amazing:

American Heritage Dictionary app in App Store


However, the price is a bit daunting; at $24.99, only the most serious students would probably be interested in purchasing the app. There is a "desk" version available for only $3.99, but--as you can imagine--some of the cooler features from the more expensive version are missing. There is also a "deluxe" version with even more features for $29.99. Quite honestly, I would probably spring for the extra $5 to get the deluxe version, but that willingness might be related to my obsession with the American Heritage Dictionary (which is my favorite dictionary in book form).

Do you have any favorite dictionary/word apps?

Thursday, September 2, 2010

Spotlight on Linguistic Tools: TreeForm

Last week I looked at an online program for drawing syntactic trees; this week I’m pointing the spotlight on a free downloadable software program called TreeForm. If you click on the link provided, you’ll see a short demo video, and you will see a link to its site on SourceForge for your free download of the program.

The best aspects about this program are that it is user-friendly and more intuitive for many students than the bracket notations. The only drawback is that you have to be able to download it onto your computer to use it (i.e., students using school computers may not be able to work with this program).

When you download it, be sure to install the entire TreeForm folder onto your computer. If you don’t install all the components in the folder, the program will be missing some of its images, which makes it a bit difficult to work with at times. Once you have the folder downloaded and installed on your computer, you are ready to use the program. It has three different icons for you to click on, depending on your operating system: .app for Mac, .bat for Windows, and .jar for Linux. If you try to open the wrong one for your computer, it simply won’t open. If that happens to you, try another.

After you open TreeForm, you will see a screen that looks like this:

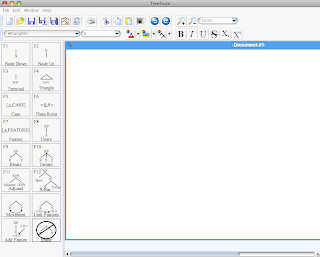
TreeForm screenshot


The large white area is your drawing board, and down the left-hand side of the screen you will find your “tray” of options:

TreeForm tray of options


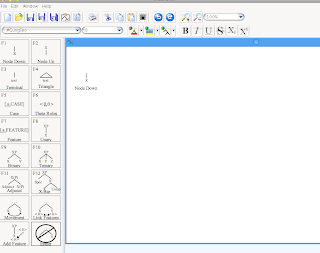
Each button on the tray presents an option for you to choose. For example, click on the ‘Node down’ button on the tray and hold down your mouse as you drag the cursor into the white area. You can’t see the cursor in the following screenshot, but here is a picture of the ‘Node down’ being dragged into the drawing area:

Dragging 'node down' to the drawing board in TreeForm


When you let go, an ‘X’ will appear on the screen. Double-click on that X to change it to any label you’d like. To build onto that node, you can either build up by selection ‘Node up’ from the tray and dragging it into the white area until the node you want to build on is highlighted. When you let go, a node will appear above the one you already had. Or you can build down by selecting ‘Node down’ and dragging that over to the screen. For instance, if you labeled the first node you put onto the screen ‘S’ (for the sentence level), then you could drag ‘Node down’ over until the S was highlighted and then release the mouse button. You would end up with a node below the S. To change the X that appears in the node, you simply need to double-click it and change the label. Let’s say you’ve labeled the first node ‘S’ and the node below it ‘NP’, and you want to add a sister node for the NP. To do that, you need to once again drag ‘Node down’ from the tray until the S is highlighted; this time when you release it, though, you will have two options for where you want to put the node:

Two options for node placement in TreeForm


If you want the second node to the right, you need to move your mouse over until the right-hand dot is illuminated green (as it is in the picture above) and click on it. If you wanted to add a third node at that same level, you do the same process you just did; only this time, you’ll have three options for placement (to the left of, in between, or to the right of the other two nodes).

Three options for node placement in TreeForm


Using that same process, you can easily build entire trees, putting in any labels you’d like by double-clicking the Xs. When you’ve reached what will be the terminal node (generally, the terminal node is the one where a word is inserted instead of a label), you can use the ‘Text’ button in the tray.

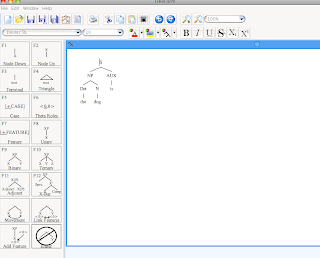
Syntactic tree using TreeForm


When your tree looks like what you want, you can go to ‘Edit’ and then ‘Copy tree’. Doing that puts the tree into your computer’s clipboard, which allows you to go to any document you’re working on and hit ‘Paste’ where you want the tree to go. Your tree will then appear in a typed document.


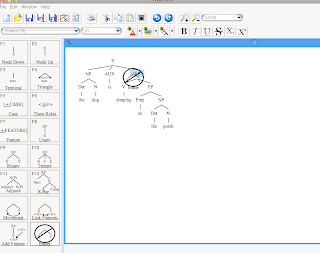
If you need to erase something, you can either hit ‘undo’ (or control-Z) if it is something you just did that needs to be undone or use the ‘Eraser’ button in the tray. To use the eraser button, click and hold down on it, dragging it over to the drawing board area. Move it over the tree until the highest node you want erased is highlighted.

Dragging the eraser and highlighting the VP node in TreeForm


When you release the eraser, that node and everything below it will be erased.

Tree from above with its VP erased in TreeForm


Using those four buttons (node down, node up, text, and eraser), you can create basic tree structures. The other buttons in the tray are for more advanced tree structures. If you play around with the features, you’ll find that you have a lot of leeway with the program and the look of your trees. You can change the font, the colors of individual nodes, the colors of branches, and more. On top of all that, you can easily use TreeForm to create any type of hierarchical tree you need: Instead of putting syntactic labels in the nodes, put anything you’d like:

Non-syntax hierarchical structure created using TreeForm


Just like with phpSyntaxTree, the best way to figure out what the program is capable of is to play with it. Go have some fun with TreeForm!

Wednesday, August 25, 2010

Spotlight on Linguistic Tools: phpSyntaxTree

If you ever find yourself in need of diagramming a sentence in a typed document, you may have noticed that not too many word processing programs have user-friendly ways of drawing and inserting trees. One way to work around that issue is to use the free online phpSyntaxTree program, which draws trees based on bracket notations. A few advantages to phpSyntaxTree are that the program is free, online (i.e., you don't have to download anything to use it), and provides an easy-to-work with picture file as its end product.

When you go to the web page, you will see something like this:


The text box on the website comes pre-programmed with this sentence already in bracket notation: [S [NP phpSyntaxTree][VP [V creates][NP nice syntax trees]]]. If you hit the "draw" button directly below the text box, you will go to a new screen that looks like this:


Once the tree is drawn, you can play with the settings across the top (e.g., take out the color, take out subscripts). When the tree looks like what you want, you can simply put your mouse over the diagram and click on it; it will download a copy of that diagram as a picture file (.PNG) to your computer, and you can then insert it into whatever document you're working on.

Once you've got the process down, it flows pretty nicely, and you can create diagrams of any kind (i.e., with any labels) to put into the text box on the website. The problem is that not all students are familiar or comfortable with using bracket notations.

For this program, the basic concept is what appears on the left inside the brackets is inserted in the mother node and what appears on the right is the daughter node. A space between the entries is interpreted as a branch or triangle. For instance, if you put [N dog] into the text box and hit the draw button, you will see a tree like this:


If you put [NP the dog] into the program, you will get a tree like this:

The first space after whatever entry you put at the left will be interpreted by the program as the separation between what is put on top (the mother node) and what is put on bottom (the daughter node). If more than one word appears in the daughter node, a triangle is used instead of a single branch (unless you turn off the triangle notation, in which case a single branch is inserted with several words below it).

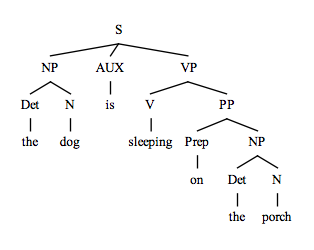
Putting this concept to work in layers, you can put notations like [S [NP [Det the] [N dog]] [VP [V sleeps] [PP [Prep on] [NP [Det the] [N porch]]]]] and get results like this:


The program keeps track of your open and closed brackets; if the numbers are not equal, the program will not allow a tree to be drawn. If you break down the sentence in its bracket notation and compare it to its tree, you will see that the basic concept of "left side = mother node" is followed throughout: [NP [Det the] [N dog]] tells the program that NP should appear in the mother node, the mother node has two daughters (Det and N), and that those daughter nodes in turn have daughter nodes (the and dog).

Let's look at that sentence a little more closely. If you type [S the dog sleeps on the porch], you'll get a tree like this:


If you want to break that single node into two, you need to put words that go together in brackets: [S [the dog] [sleeps on the porch]]. Now you're telling the program to have two branches under S (branch 1: the dog; branch 2: sleeps on the porch). But if you hit "draw" right now, you'll be left with this:


Why did that happen? Because the program doesn't distinguish between words and labels unless you put them in their appropriate places. So the program read [the dog] as the is the mother node and its daughter is dog. The same applies to the other set of brackets. You can fix this by inserting labels for both of these: [S [NP the dog] [VP sleeps on the porch]].


From there, you can continue breaking it down until you get the tree with a complete break down. Just remember that what is on the left is inserted into the mother node, a space after that entry indicates a branch/triangle, and more than one branch from a single mother node is indicated by sets of brackets. For instance, [NP [Det] [Adj] [N]] will look like this:


Separating the entries into brackets told the program "don't interpret this as a single unit but rather as three separate daughter nodes."

Once you get the hang of using bracket notation, getting the tree structure you want becomes easier. I encourage you to play with the program to see what different structures look like in their bracket form and compare that form to its tree form. Playing with the program is the best way to learn it.

Next week I will showcase another way to get tree diagrams in typed form to insert into documents. In the meantime, I hope you will have some diagramming fun with phpSyntaxTree.